What is Custom Screen Printing
Screen printing is the process of applying ink to a stenciled mesh to create a printed design. This technique is widely used in many industries. You are likely to have seen or used a screen-printed product. The process is also called silk screen printing, serigraphy, and all refer to the same basic technique.
You can use screen printing to make posters, large canvasses and artwork. It can also be used to print fabrics and textiles. It is ideal for creating all types of products, Prints U Custom T Shirts. This guide answers all your questions about silk screen printing.
- Screen printing: What is it?
- Screen printing: Why is it used?
- Screen printing instructions step-by-step
- Screen printing equipment: A guide
- Is screen printing susceptible to fading?
- What’s the difference between digital and screen printing?
- What’s the difference between heat transfer printing and screen printing?
- Screen printing: History
What is screen printing
Screen printing is the process of applying a stencilled design to flat surfaces with a mesh screen, ink and a squeegee. Most screen printing is done on paper or fabric. It is possible to screenprint on metal, plastics, wood, and glass using special inks. A stencil is created using fine mesh screens. To make an impression on the surface below, push ink (or paint) through the stencil.
This process is also called “silk screening” or “silkscreen printing”. Although the actual printing process is very similar, the way the stencils are created can differ depending on the materials. There are several stencilling techniques.
- You can cover any area you desire with vinyl or masking tape.
- To paint stencils onto mesh, use’screenblockers’ such as glue or lacquer.
- A light-sensitive oil can be used to create a stencil. This stencil can then be used to create a photograph.
You can create designs using one or more colors of ink with screen printing. If you want to create Custom Screen Printing, you will need to apply the colours individually with separate stencils for multicoloured items.
What is screen printing used for
Because it produces vivid colours even on dark fabrics, screen printing is very popular. The ink or paint is also applied to the fabric’s surface to give the print a pleasant tactile feeling.
This method is very popular as it allows printers to print multiple copies of a design. You can reuse the same stencil to make multiple copies of the accessory or garment. Screen printing can be used to make large quantities of Prints R Us Custom T-Shirts for work uniforms and teams.
With professional equipment and an experienced printer, it is possible to create multi-coloured complex designs. https://printsrus.com/ This process is more complicated than digital printing but allows for vibrant colours.
Screen printing step by step
Although screen printing can be done in many ways, they all use the same basic technique. This is the type we’ll be discussing below. This type of printing uses a special light reactive adhesive to create custom stencils. This is the most popular type of commercial printing.
We will walk you through every step of the screen printing process. Custom Screen Printing
Step 1: Design the design
The printer will print the design they want on the final product. This is what creates the stencil.
Step 2: The screen is now ready
The mesh screen will be chosen by the printer according to the complexity of the design as well as the fabric texture. The mesh screen is then coated with light-reactive oil. This will allow the screen to harden in bright light.
Step 3: Now, open the emulsion.
The entire thing can be exposed to sunlight after the design is printed on the acetate. The light hardens the emulsion, so that liquid remains on the design-covered areas of the screen.
A separate screen is needed to apply each layer if you intend to use multiple colors in your final design. A printer that can design and align each stencil correctly is the best person to create multi-colored products.
Step 4: Clean the emulsion and make the stencil
After the screen has been exposed for some time, any areas that are not covered by the screen’s design will have hardened. It is important to thoroughly rinse off the unhardened emulsion. This leaves a clear imprint that allows ink flow through the screen.
The screen can be printed once it has dried. To ensure that the imprint matches original design, the printer will correct or make any touch-ups. The stencil is now ready to be used.
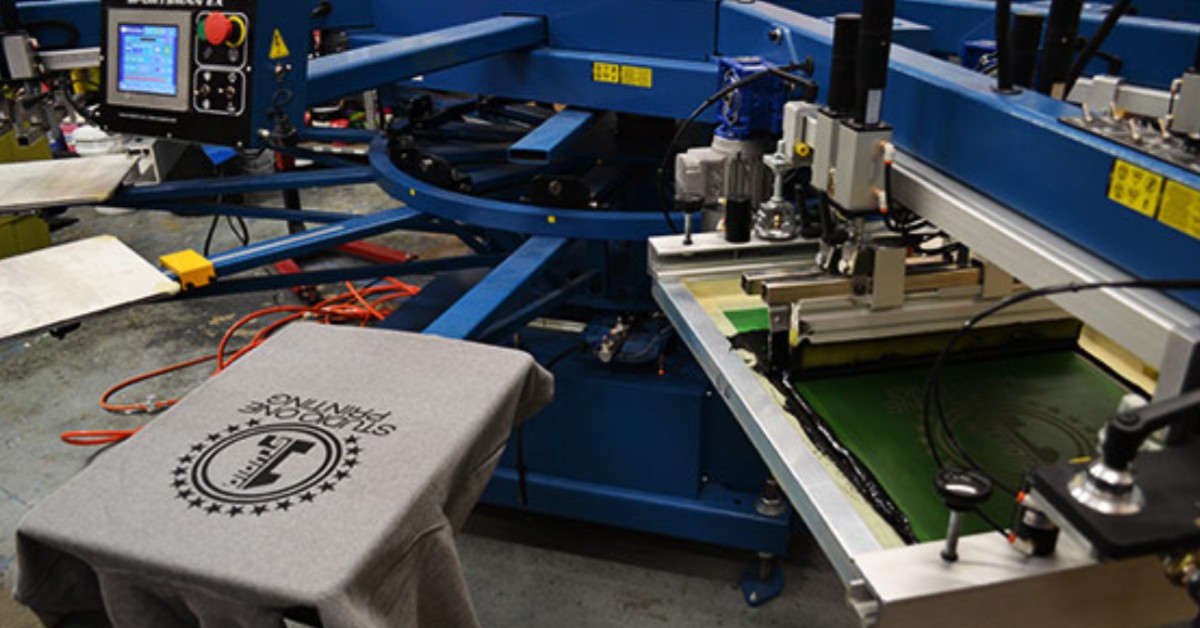
Step 5: Now the item is ready to be printed
The screen is then placed on the printing press. The item or garment being printed is laid flat on the board.
There are many options for presses, both manual and automatic, but most commercial printers use an automated rotary-carousel. Multiple screens can be used simultaneously. This printer can be used to quickly apply separate colours to multicoloured prints.
Step 6: Apply ink to your item through the screen
The screen is then placed on the board. To move the ink along its length, a squeegee is used to apply the ink to the screen’s top. To imprint the design beneath, push the ink through the stencil.
When multiple items are being printed, the screen is raised so that a new item can be added to the printing board. The process is repeated.
Once all items are printed, wash the stencil with a detergent to clean it so that you can use the mesh again to create new stencils.
Step 7: Now, the product has been dried and inspected.
After printing the product, it is dried in a dryer. The ‘cure ink’ creates a smooth, colourfast finish. The final product is thoroughly washed before being handed over to its new owner.
printing. Digital printers can’t create texturized effects.